Scheduler
The Scheduler lets you build a reusable, named sequence of scripts and breaks that runs unattended — start a script, run it until some condition is met, take a break, move on to the next script, and optionally loop the whole thing. It's useful for chaining multiple goals together (for example: craft an item, then restock supplies, then train the skill) without having to babysit the client.
A schedule is made of three kinds of steps that you stack in order:
- Script — runs a script until a stop condition is met
- Break — pauses for a random amount of time
- Loop — jumps back to the start of the schedule, either a fixed number of times or forever
Opening the Scheduler
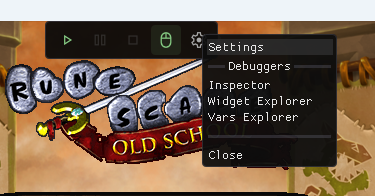
Open the client settings via the gear icon on the client's overlay toolbar, then go to the Schedules tab.
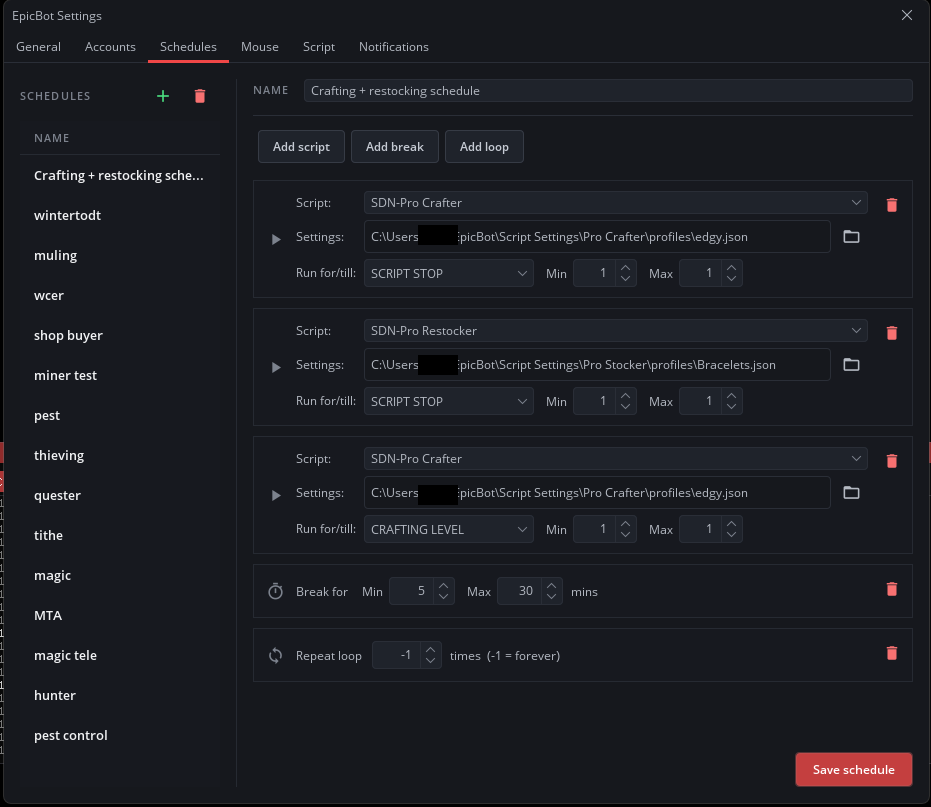
The Schedules tab has your list of saved schedules on the left, and the editor for the selected schedule on the right.
Creating a schedule
- Click the + button above the schedule list and give it a name.
- Select it from the list to open the editor.
- Give it a name in the Name field, then use Add script, Add break and Add loop to build the sequence.
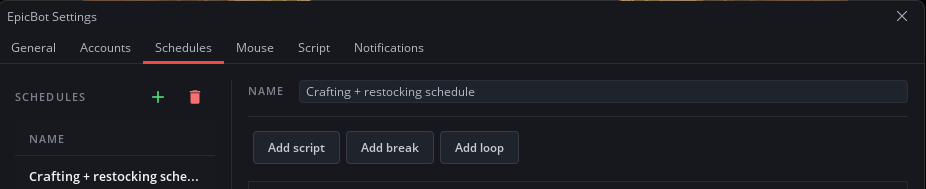
Click the trash icon next to an item to remove it, or the trash icon above the schedule list to delete the whole schedule.
Creating script profiles
Each Script item in a schedule launches a script with a saved profile — a snapshot of that script's settings. Profiles are created from inside the script's own GUI, not from the Scheduler.
- Start the script normally and configure its settings the way you want to run it.
- Under Profiles, type a name into the text field.
- Click Save Profile.
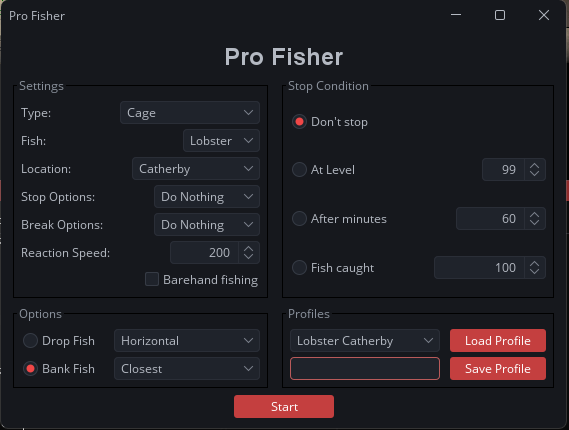

Use the dropdown and Load Profile to bring a saved profile back into the GUI later. Every script that supports profiles saves them the same way, to:
C:\Users\<YourUsername>\EpicBot\Script Settings\<Script Name>\profiles\<profile name>.json
This is the file you pick when you set a Script item's Settings field in the Scheduler — see below.
Adding items
Script
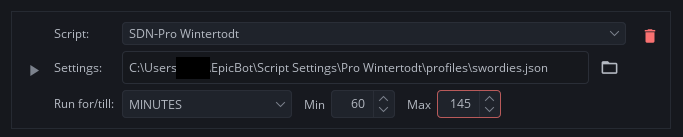
Adds a script run to the schedule.
- Script — the script to run
- Settings — a saved script profile (
.txt/.json) to launch the script with, chosen via the folder icon - Run for/till — the stop condition:
- MINUTES — run for a random duration between Min and Max minutes
- <Skill> LEVEL (e.g.
MINING LEVEL) — run until the skill reaches a random level between Min and Max - SCRIPT STOP — run until the script stops itself


Break
Pauses the schedule for a random duration between Min and Max minutes before continuing to the next item.

Loop
Jumps back to the first item in the schedule.
- Set it to
-1to loop forever - Set it to a positive number to loop that many times
- A loop item must be the last item in the schedule, and only one is allowed per schedule

The editor validates your schedule when you save: a break's Min can't be greater than its Max, a loop can't be set to 0, and a loop item must be the final item in the list.
Saving
Click Save schedule once you're happy with the sequence.
Running a schedule
Pick your schedule from the Schedule dropdown in the Start Script dialog before starting a script. This is the same dialog you normally use to pick your account, script and mouse profile.
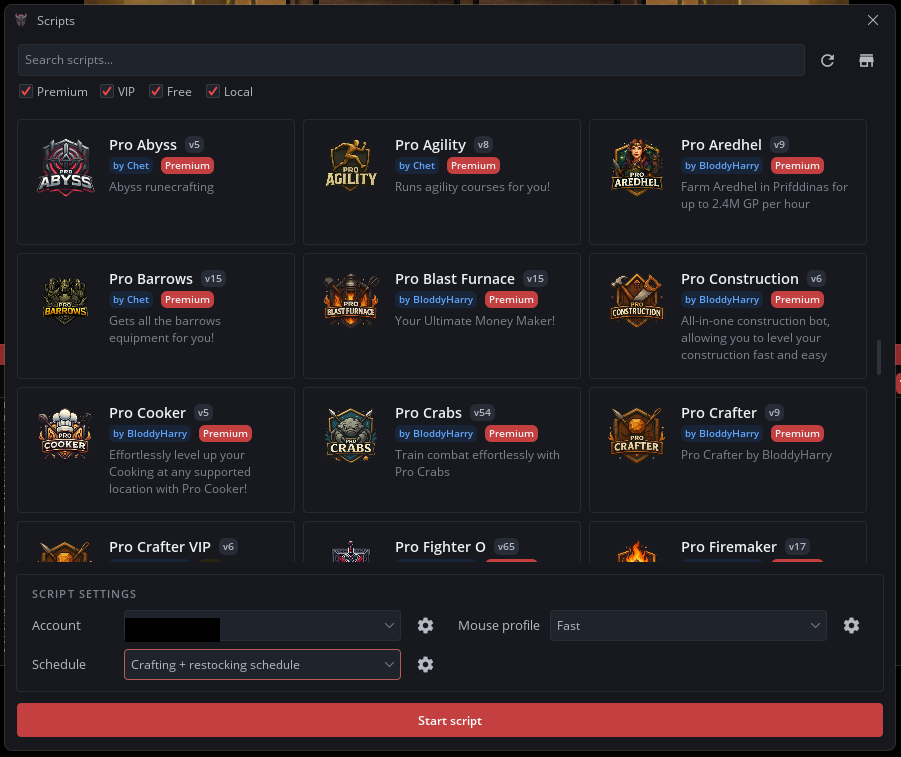

The gear icon next to the dropdown jumps straight back into the Schedules settings tab if you want to tweak it.
You can also start a schedule from the EpicBot CLI with the --schedule-id flag.
Only one schedule can be active per bot client at a time.